I gave a talk at ElixirConf 2015 on combining the Phoenix web framework with the Elm programming language. This is the tutorial that was referred to in that talk.
The tutorial walks through the creation of a very basic seat saving application, like one you'd use when booking a flight for example. The application will do just enough to demonstrate the mechanisms for getting the two technologies talking to each other.
There is an accompanying repo for this tutorial. Each of the numbered steps has an associated commit so that you can just look at the diffs if you'd rather not read through the whole thing.
So far on Phoenix with Elm ...
In Part 11, we looked at how to fetch our initial seat data via Phoenix channels. Our application, when it loads, opens a web socket to the server and then gets the initial seat data over this connection.
Now we want to take a look at how to send and receive data over that channel in response to user interaction with the site.
Booking a seat
For this next part of the tutorial we're going to implement the mechanism that allows users to book a particular seat on the imaginary flight that we have.
This is going to be a very naive implementation. There will be no checks to see if the seat has already been booked, no checks to ensure that only one user can book a seat at the same time, and so on. We just want to demonstrate how a request can be made and how the subsequent response can be handled.
Making a request
Let's start with the request. We want the user to be able to click on a seat and for that click to result in a request over the web socket channel to our Phoenix application. This is actually quite a complex thing to do in Elm, and the way that I'm about to show you is a bit of a hack. It has sparked a bit of a debate and has led to a few proposed solutions, which I'll link to at the end of this post.
We'll approach this from an outside-in point of view because it will allow us to introduce new concepts when we are able to explain why we need them.
To send a request from our Elm application to our Phoenix application we need to use ports. Any data coming into or leaving our Elm application needs to go over ports. We introduced incoming ports in Part 11, but now we need an outgoing port.
The type annotation for our port will look like this:
port seatRequests : Signal Seat
We're going to be sending out data (Elm will use JSON under the covers) in the shape of a Seat. In order to be able to send things out over this port we need to hook it up to a Signal of type Seat. In our instance we also want to be able to send seat data to that Signal whenever we click on a seat in the UI. For this we can use a Mailbox. A Mailbox has an address that we can use to send values to and an associated Signal that contains the values sent to that Mailbox over time. In other words, any values we send to the Mailbox appear on its Signal. We can then attach our outgoing port to that Signal so that any values sent to the Mailbox are immediately sent out over the port.
Let's start putting it together and explain more as we go along.
We'll start by creating our Mailbox. At the end of the web/elm/SeatSaver.elm file add the following:
seatRequestsBox : Signal.Mailbox Seat
seatRequestsBox =
  Signal.mailbox (Seat 0 False)
This function returns a Signal.Mailbox that has an associated Signal of type Seat. Because Signals are values that change over time we need to give it an initial value. My solution here is a little hacky. We just create a new Seat record with a
seatNoof 0 (so that it doesn't match any of our database records) and set theoccupiedvalue toFalse.Now we can create our outgoing port that listens on the Mailbox's Signal.
port seatRequests : Signal Seat
port seatRequests =
  seatRequestsBox.signal
We now have a port that will send data out of our Elm application whenever we send a Seat record to the Mailbox that we set up. In order to consume this data we need to subscribe to that port in our web/static/app.js file.
// listen for seat requests
elmApp.ports.seatRequests.subscribe(seat => {
  console.log(seat)
})
We subscribe to the
seatRequestsport and give it a function to call whenever a new value is sent across the port. For now we are just logging what we receive to the console so that we can check that it works.Of course we're not actually sending any values to that mailbox/port just now and so we won't see anything happening yet. Let's add that now.
We want to be able to click on a seat in our UI and for that to result in a request being made. Whilst this sounds simple, in the Elm architecture it's a little more complicated. When we make the request we don't need to make any changes to the model (that will happen when we get a response) but we do want to have a side-effect that will make the request. We've seen this pattern before in Part 9 when we made an HTTP request.
We start by changing the Action name on the
onClickcall of theseatItemview function fromToggletoRequestSeat.seatItem : Signal.Address Action -> Seat -> Html seatItem address seat = let ... in li ... , onClick address (RequestSeat seat) ...Then we create that Action in our
update.type Action = ... | RequestSeat Seat update : Action -> Model -> (Model, Effects Action) update action model = case action of ... RequestSeat seat -> (model, sendSeatRequest seat)As you can see we just return the current model with no changes to it and, instead of an
Effects.none, make a call to a function calledsendSeatRequestpassing it the given seat.Let's now create that
sendSeatRequestfunction. At the bottom of the web/elm/SeatSaver.elm file add the following function definition to it:-- EFFECTS sendSeatRequest : Seat -> Effects Action sendSeatRequest seat = Signal.send seatRequestsBox.address seat |> Effects.task |> Effects.map (always NoOp)Let's look at each line in turn. The type annotation tells us that our
sendSeatRequestfunction is going to take an argument of typeSeatand then return anEffects Action(the function needs to return anEffects Actionbecause that is the return type that ourupdatefunction is expecting).The function definition looks similar to the
fetchSeatsfunction we built in Part 9. We useSignal.sendto send the passed in seat to our mailbox, the address of which we get by callingseatRequestBox.address. However we don't call this function straight away, we use an Effects.task to queue the request to happen as part of the Elm Effects process. The final lineEffects.map (always NoOp)basically says, regardless of the result of runningSignal.send seatRequestsBox.address seatalways call aNoOpaction in theupdatefunction.What
NoOpfunction I hear you ask. The one we are just about to write. :)For the origin and discussion around the `sendSeatRequest` function see this gist and the associated conversation. A
NoOpfunction is one that has no effect on the application whatsoever. In other words it does not change the current state of the model and it does not create an Effect. We add it to ourupdatefunction as follows:type Action = ... | RequestSeat Seat | NoOp update : Action -> Model -> (Model, Effects Action) update action model = case action of ... RequestSeat seat -> (model, sendSeatRequest seat) NoOp -> (model, Effects.none)This allows us to make our request to the outside world without changing the current state of the application. We'll concern ourselves with updating the application state when we get a response back to our request.
If we visit localhost:4000 in the browser now and click on a seat, we should see the data for that seat appearing in the console.
Dealing with the request
Now that we can send the data out of the Elm application, we need to use JavaScript to send that data over the Phoenix channel we set up in Part 11.
We'll start by changing our web/static/js/app.js file so that, instead of logging the received seat data to the console, we'll push it over our channel.
elmApp.ports.seatRequests.subscribe(seat => {
  channel.push("request_seat", seat)
})
Now we can open the web/channels/seat_channel.ex file and add the following function to handle the
request_seatmessage.def handle_in("request_seat", payload, socket) do seat = Repo.get!(SeatSaver.Seat, payload["seatNo"]) seat_params = %{occupied: !payload["occupied"]} changeset = SeatSaver.Seat.changeset(seat, seat_params) case Repo.update(changeset) do {:ok, seat} -> broadcast socket, "seat_updated", seat {:noreply, socket} {:error, _changeset} -> {:reply, {:error, %{message: "Something went wrong."}}, socket} end endThe
handle_infunction pattern matches on the "request_seat" message and takes two further arguments:payload, which holds the seat data we send in, andsocketto carry the current state of the socket.We start by retrieving the current seat record from the database by the
seatNogiven in the payload, and then create a changeset that sets the value of theoccupiedfield to the opposite of the value given in the payload. Then we attempt to update the record in the database. If it is successful we broadcast an "updated" message to all channel connections and mark the socket asnoreply. If it fails then we set areplyon the socket with an error message.Please note: I had to upgrade to Ecto 1.1.4 in order for the above code to work. If you run in to a similar issue, upgrade postgrexto~> 0.11in mix.exs and then runmix deps.update postgrexin the terminal.Back in web/static/js/app.js we can now handle those expected responses by updating our port subscription.
elmApp.ports.seatRequests.subscribe(seat => {
  channel.push("request_seat", seat)
         .receive("error", payload => console.log(payload.message))
})

channel.on("seat_updated", seat => console.log('updated seat: ', seat))
First we handle the error by adding a call to the
receivefunction after ourpushfunction call. We'll just output any errors directly to the console for simplicity.Then we bind to the
seat_updatedchannel broadcast passing it an anonymous function that, for now, also outputs to the console. This time with the seat data sent with the broadcast.Firing up a browser we can see now that the changes are being made and sent to the console, even though the UI is not currently updating visually.
Handling the response
OK, so now we are making the request, updating the database and then broadcasting the result across the channel. We now need to send that response back to our Elm application and have that complete the circle.
In our web/static/js/app.js file change the binding to the "seat_updated" event to the following:
channel.on("seat_updated", seat => elmApp.ports.seatUpdates.send(seat))Instead of logging the seat data to the console we instead send it to a new Elm port, that we will define shortly, called
seatUpdates.We'll also need to set an initial value for the
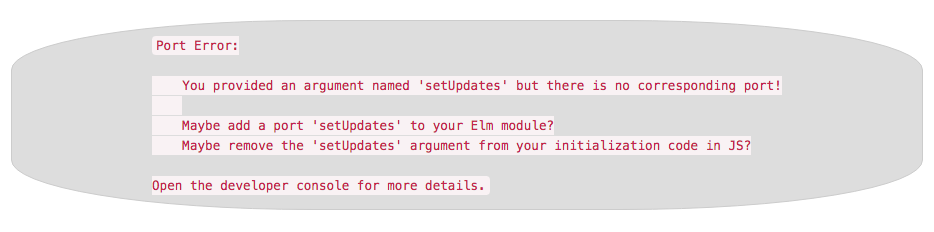
seatUpdatesport. Back up where we define theinitialStatevar, change it as follows:var ... , initialState = { seatLists: [], seatUpdates: {seatNo: 0, occupied: false} } , ...We use the same trick that we did on the Elm side of creating a dummy seat that doesn't match one in our database.
If we check our browser just now we'll see a nice, explanatory error message from Elm telling us that we need to create the port that we just initialised. Let's do that now.
In our web/elm/SeatSaver.elm file we'll start by defining the
seatUpdatesport.port seatUpdates: Signal SeatNow we need to convert this Signal of Seat into a Signal of Action so that we can route it to the
updatefunction. We already have anincomingActionsSignal of Action that is hooked into theupdatefunction. Elm has aSignal.mergefunction that lets you combine two Signals of the same type into one Signal. Change yourincomingActionsfunction as follows:seatListsToSet: Signal Action seatListsToSet = Signal.map SetSeats seatLists seatsToUpdate: Signal Action seatsToUpdate = Signal.map Toggle seatUpdates incomingActions: Signal Action incomingActions = Signal.merge seatListsToSet seatsToUpdateWe split out our existing
Signal.mapforseatListsinto its own function. We then create an identical one for our newseatUpdatesSignal. This function just maps any Seat values on that Signal into calls to theToggleAction with that Seat.We then change our
incomingActionsfunction definition to merge our two new Signals into one combined Signal of Action.Now all we need to do is to change the definition of our
ToggleAction in theupdatefunction.update : Action -> Model -> (Model, Effects Action) update action model = case action of Toggle seatToToggle -> let updateSeat seatFromModel = if seatFromModel.seatNo == seatToToggle.seatNo then { seatFromModel | occupied = seatToToggle.occupied } else seatFromModel in (List.map updateSeat model, Effects.none) ...We change the line
{ seatFromModel | occupied = not seatFromModel.occupied }to{ seatFromModel | occupied = seatToToggle.occupied }so that the occupied state is taken from the passed in seat rather than just the opposite of what it originally was.The result will be a new model with the Seat that was provided in the response updated to have the correct occupied state. As we are now finished, we have no further Effects to make and so we use
Effects.noneas before.Visiting our application for one last time in the browser we are now able to click on seats, have them change their occupied state in the database and then update to show their new occupied state in the UI.
Summary
We are now able to click on an unoccupied seat and have it marked as occupied, and vice versa. As mentioned at the start of this post, our implementation is pretty naive and could definitely bear some improving. However this is left as an exercise for the reader. This will be the last in this series of blog posts (for now at least). If you've enjoyed these posts, please feel free to carry on with your own projects and blog posts and use the hashtag #phoenixelm to share them.
Further reading
If you're hungering for more information about Phoenix and/or Elm, you could do worse than check out the following. :)
Phoenix/Elixir
Elm
Phoenix with Elm
- I started a thread on the elm-discuss google group to see if we could get a more formal way of working with Phoenix and Elm over channels.
- Wiki page started by AstonJ on elixirforum.com
- An implementation of native channels in Elm https://github.com/svard/elm-phoenix
- Another implementation https://github.com/voltone/elm-phoenix
Acknowledgements
Thanks very much for following along. A special thanks to all those who provided feedback and submitted issues, it is because of you that many errors were caught and corrected.
Final thanks go to my colleagues at Cultivate: Paul Wilson for seeding the idea in the first place (and giving me the time to build these posts and providing valuable feedback along the way), Peter Aitken for reviewing the posts and Spencer Turner for providing the design for the site.